|
ART ASTRONOMY Uranus
2023 on Sun, Moon, Venus & Miscellaneous PROCESSING
TUTES |
ASI224MC IMAGE PROCESSING TUTE |
|
Part 2 REGISTAX6 PROCESSING |
|
|
|
|
|
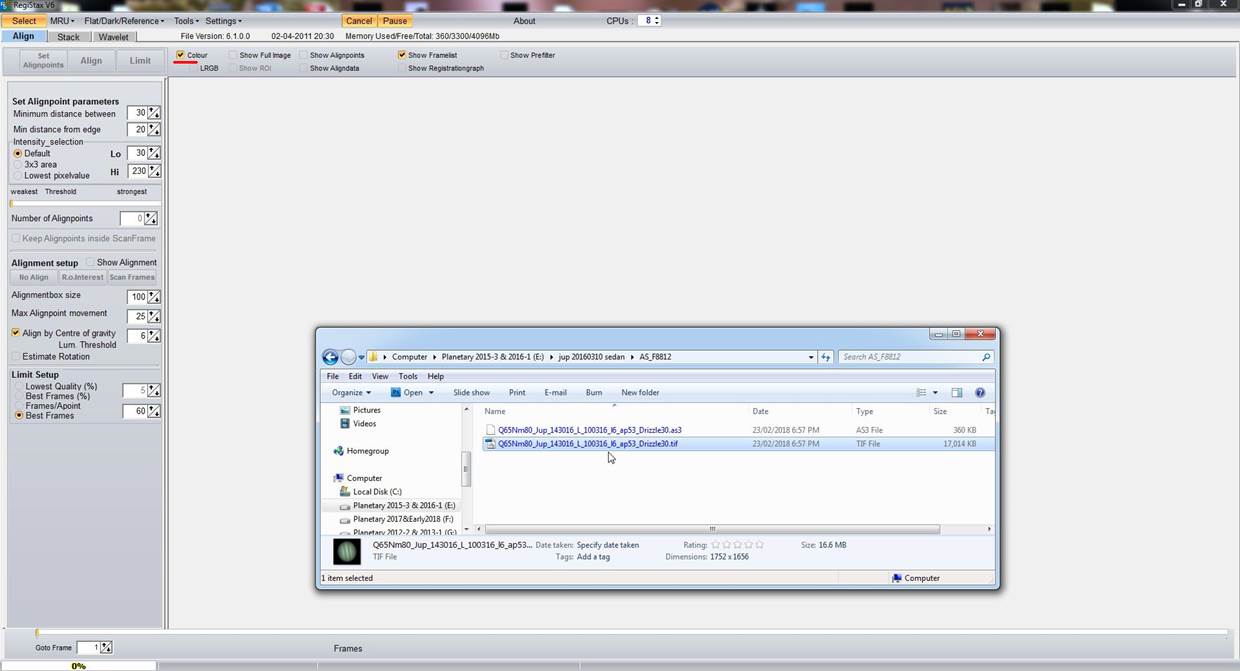
Here we have opened the folder created & are about to "drag & drop" the RAW stack into Registax6 for wavelets sharpening. (saved as a .tif which I opted for at the beginning in AS!3 btw) |
|
|
|
|
|
Unless you have set R6 in the "Settings" controls to "Stretch FIT/TIFF - No" the little pop-up window above will appear upon dropping the file into R6 - I just click "No" You do not want to allow R6 (or any other program for that matter) to automatically stretch the histogram for you instead of controlling that application yourself! ;) |
|
|
|
|
|
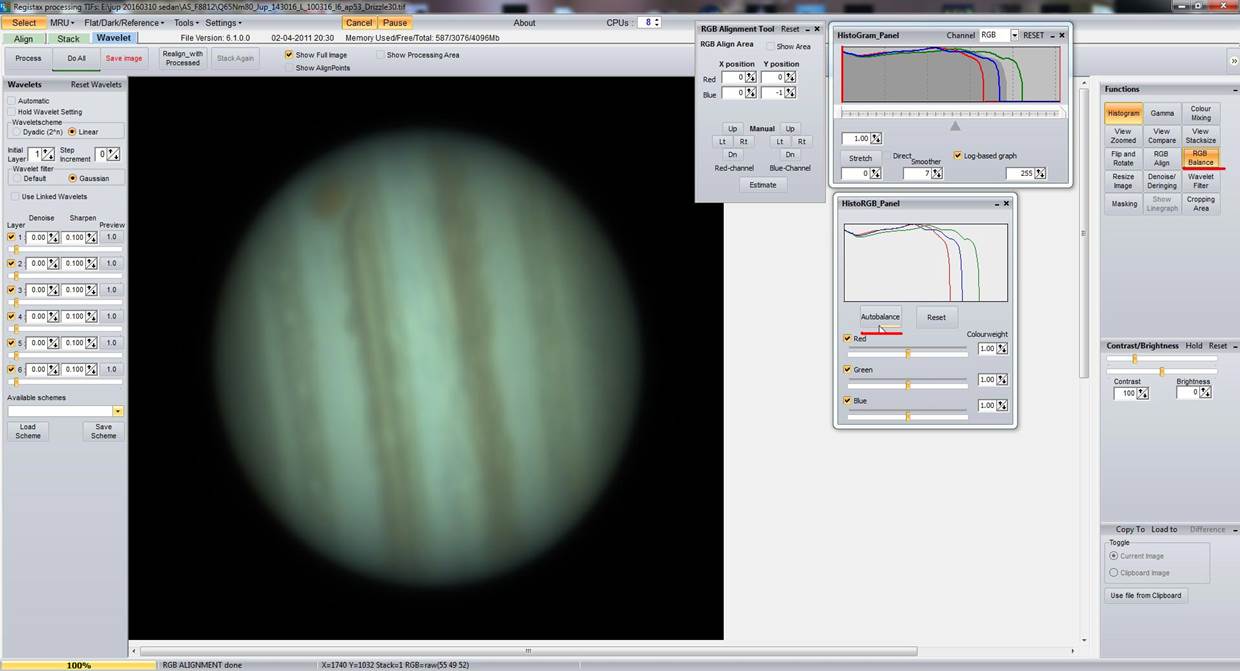
Once the image appears click on the various tabs etc I have annotated in red...the "Histogram," the "RGB Align" & "Show Full Image." If you are using a 3x drizzle image stack here you won't need to click on the "View Zoomed" tab because you will be able to see any noise created during sharpening fairly easily - if not, click on the "Zoom." Two aspects worth noting here, the histogram display reveals a gap on the rh (right hand) end of the graph. (set it to "Log-based graph" btw) It is important to make sure when applying wavelets sharpening not to let this graph extend beyond the rh limit which it can do - this results in what is called "clipping" & effectively removes aspects of the image re pixel values that fall outside of the maximum values encapsulated, resulting in an image losing real detail at times. Secondly, a little green square will appear on the planet image when you click the "RGB Align" tab - this is used to align the channels in this coloured (rgb) image by shifting the red & blue channels wrt the green channel. The next images show how to enable this function... |
|
|
|
|
|
|
|
|
Use your mouse to "grab" one corner of that little green square & drag/pull it out holding the left-click of the mouse down...then do the same to a diagonally opposite corner of the square until you have encompassed the planet & some background at least within the much larger green square you have now created. |
|
|
|
|
|
This done, click the "Estimate" tab in the "RGB Align Tool" window & wait. |
|
|
|
|
|
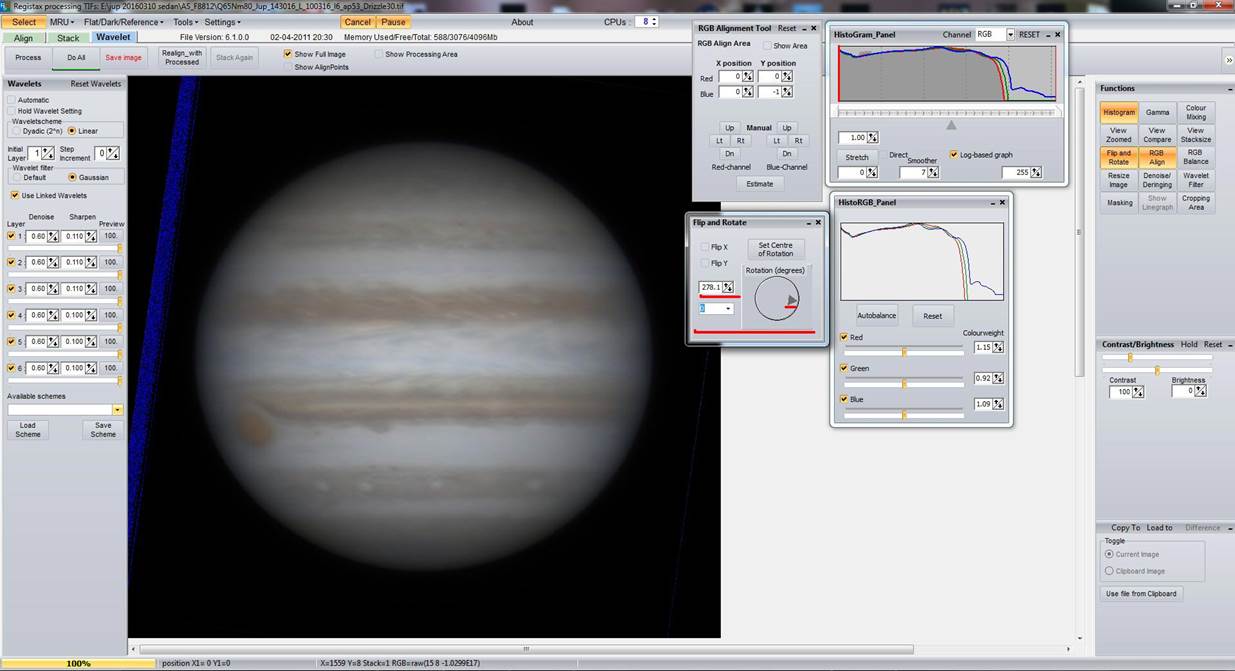
This done, you see the results in that little window - a shift of 1 pixel in the blue channel alignment: usually AS!3 does a very good job of channel alignment but it is worth checking it here in Registax6... |
|
|
|
|
|
Now you click on the "RGB Balance" tab on the rhs of R6 & bring up that little window & hit "Autobalance." |
|
|
|
|
|
Here you can see the adjustments to the colour-balance of Jupiter & the effect that the control has made. |
|
|
|
|
|
For sharpening a 3x drizzled stack I use "Linked Wavelets" by checking this box in R6: as long as the quality of the data is sufficient to allow 3x drizzle I always utilise this - this requires the aggressive wavelets applications that "Linked" applies but almost paradoxically results in a much softer & aesthetically-pleasing image outcome...if the data is not good enough to drizzle then I advocate not using the "Linked" approach. (leave the box unchecked) As mentioned beforehand, 1.5x drizzle in AS!2 or 3 actually drizzles 3x then halves the scale when outputting the stack for you: so in my opinion you are better off either 3x or not drizzling at all, because you can halve the size/scale in R6 using "Resize Image" & yhe additional filter applications R6 offers. (Lanczos is best usually) |
|
|
|
|
|
The above image of the Registax6 (R6) screenshot shows the type of wavelets applications I have used for this particular image: it is important to note that depending mainly upon the quality of the captured data you will find that you are able to apply more or less sharpening here - the stack-size (number of frames) in your stack & the quality of the individual frames & the amount of noise in each frame will all have a bearing, although it must be understood that better-quality overall stacks should result in better image outcomes.
You will notice the broad rough band of blue in the background to the planet - this is nothing to worry about & will be fixed in post-processing - it is reflected in the histogram where you can see the blue grph meandering off the rhs. |
|
|
|
|
|
Here I have enabled the "Flip and Rotate" tab on the rhs of R6 & grabbed the little black pointer in the circle in the pop-up window to rotate the planet to a horizontal position wrt the bands, with North up. (that blue band in the background is now on the lhs instead of the top btw) |
|
|
|
|
|
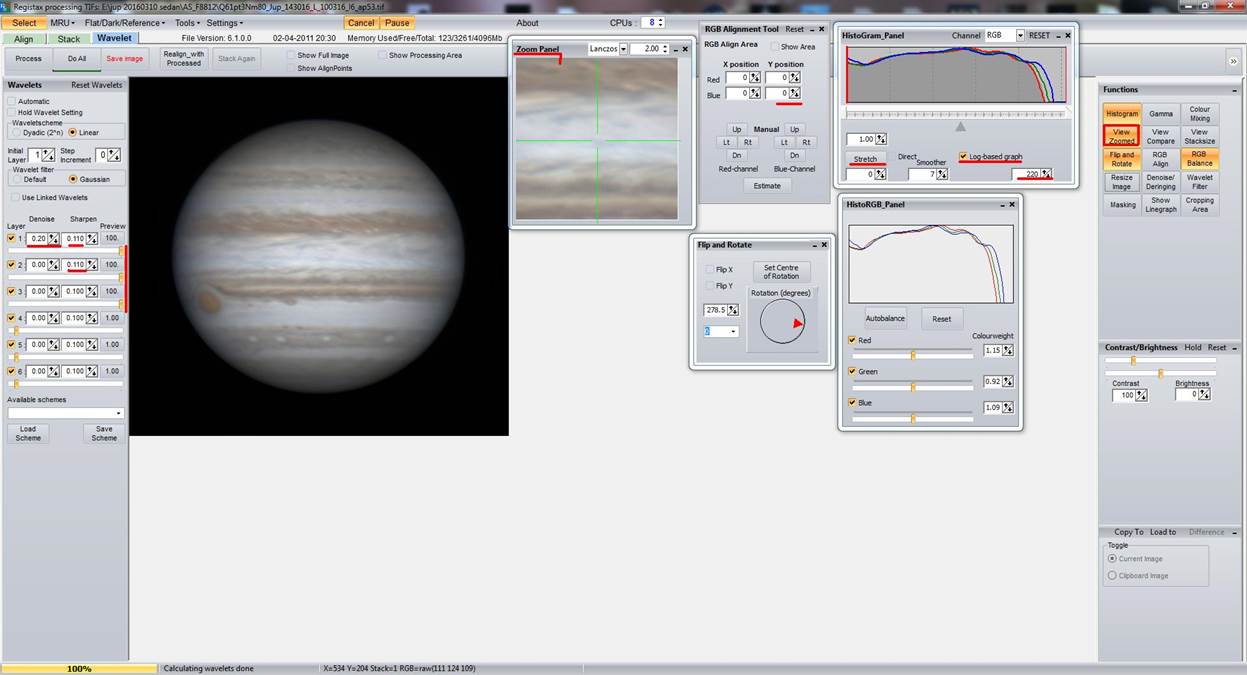
For interest's sake I have included a non-drizzled stack from AS!3 in this tute: there are a couple of points of interest. You see that the histogram has been stretched (brightening the image by sliding the rh slide towards the left - or clicking/lowering the value on that value display to "220") & activating the "Stretch" button. I did this manually for the sake of a clearer image here. Remember not to "clip" the histogram & also that I am only doing this here to make this image appear a bit clearer. (as well as demonstrate what these controls do!) You will also notice that there was no channel misalignment when you look at the "RG Align" window results - probably due to not drizzling the image in AS!3. Also, the "View Zoomed" window has been enabled to help determine the amount of "Denoise" needed for the image, to remove noise generated in the sharpening applications. The sharpening is much less aggressive for the non-drizzled image stack as is the amount of "Denoise" where only the first slider's denoise needs to be applied. |
|
|
|
|
|
Here examine the planet's edges where I have draw lines pointing to a dark band just inside the edge of the disk: this is occurring because of the degree of sharpening I have applied. (you can see the increased slider values compared to one of the images above, where now I have increased "Sharpen" to "0.11" for all the sliders instead of just the first 3)) Known as the "Gibbs Effect" it is also commonly referred to as a "sharpening artefact" & something that should be avoided or kept to a minimum. |
|
|
|
|
|
|
|
|
The above 2 screenshots simply show me saving 2 differently-sharpened images in R6...a "softer one with "-ss" on the end of the filename & a sharper one (but not sharpened to the extent that the artefact effect is as apparent as in the previous example) named "-Xs" This can be beneficial if you wish to sharpen further in AstraImage using deconvolution or in programs such as Photoshop with unsharp mask etc...softer outcomes from R6 might allow for more "headroom" when sharpening elsewhere without introducing strong artefacts, & starting with a softer image might possibly even provide a better end-image. :) |